Cast iron exhaust manifold brazing can be a time-consuming and complicated process. In the world of automotive repairs, particularly when dealing with vintage vehicles, cast iron exhaust manifolds often present challenges due to their vulnerability to cracks and high thermal stress. When a cracked manifold needs repair, it’s critical to use the correct method to restore its strength and function. One such effective technique is cast iron exhaust manifold brazing–a method that provides a durable, cost-effective solution, ensuring the manifold’s longevity. A great example of this technique in action is demonstrated in this instructional video. Muggy Weld helps Resurrection Autobody and Paint in Olympia, WA, repair a cracked 1963 Cadillac DeVille exhaust manifold with SSF-6 silver solder. Below, we’ll walk through the process of cast iron exhaust manifold brazing, detailing each step involved in this specific repair.
Initial Problem: Cracked Exhaust Manifold
The cast iron exhaust manifold from a 1963 Cadillac DeVille originally had a crack. While this may seem like a minor issue, cracks in cast iron manifolds are notorious for growing larger with time and heat exposure, especially if an improper repair method is used. This was the case with the original repair attempt, where the crack quickly expanded into a hole as work on the manifold continued.
Solution: Cast Iron Exhaust Manifold Brazing
To repair the damaged exhaust manifold, Muggy Weld turned to an effective solution: cast iron exhaust manifold brazing. Brazing is a metal-joining technique that uses a filler material to bond metal pieces together. Unlike welding, where the base metals are melted, brazing requires only the filler material to reach its melting point, leaving the base metal largely unaffected by the heat.
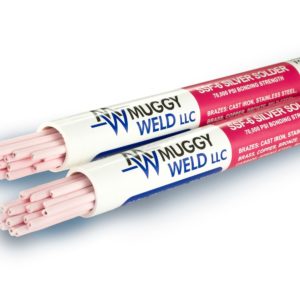
In this case, Muggy Weld used SSF-6 Silver Solder and a MAPP gas torch to perform the brazing. When the MAPP gas ran out, they switched to an oxyacetylene torch, which provided a more consistent and higher temperature. This section will break down the process they followed to ensure the repair was successful.
Step 1: Preparing the Cast Iron Exhaust Manifold
Before diving into the brazing process, preparation is key. The first step involves cleaning the damaged area thoroughly. Cast iron, especially older pieces like this 1963 Cadillac DeVille exhaust manifold, often contains residues, rust, and oil that can interfere with the bonding process. Here’s how to ensure the surface is ready for brazing:
- Bevel the Crack: The crack in the manifold needs to be beveled to help the filler metal bond better. Using a grinder or abrasive tools, you can create a V-shaped groove along the crack. This allows the filler material to flow into the crack and bond more effectively, preventing further cracks from forming.
- Clean the Cast Iron: Once the crack is beveled, it’s important to clean the entire area until it is shiny. Any dirt, oil, or old metal from the grinding process must be removed to ensure the filler material can make a strong bond with the base metal.
- Preheat the Manifold: Cast iron is prone to thermal shock, which can cause the material to crack or warp during the repair process. To prevent this, preheat the manifold using a torch. This process removes any moisture and ensures a more even cooling once the brazing is complete. It also helps to make the material more receptive to the filler metal. Preheating should continue until the cast iron begins to turn a dull red color.
Step 2: Applying the SSF-6 Silver Solder Filler
With the manifold prepped and heated, it’s time to apply the filler metal. In this case, SSF-6 Silver Solder was used due to its excellent compatibility with cast iron and its ability to form strong, durable bonds. Here’s how the brazing process unfolded:
- Apply SSF-6 Flux: The first step in applying the filler is to coat the crack with SSF-6 flux. The flux is essential because it prevents oxidation and promotes better bonding between the base metal and the filler rod.
- Deposit the Filler Rod: Next, the SSF-6 silver solder rod is applied to the crack. The MAPP gas torch (or oxyacetylene torch) is used to melt the filler rod, which then flows into the crack. As you deposit more SSF-6, it’s crucial to ensure that it flows evenly into the beveled area, forming a strong bond between the filler material and the cast iron.
- Ensure Even Flow: After each deposit, it’s essential to allow the filler to flatten and bond with the base metal. As the SSF-6 silver solder melts and fills the crack, make sure that the rod is being applied in an even, controlled manner. This ensures that the filler bonds properly and that no weak spots are left in the repair.
- Troubleshoot Adhesion Issues: Sometimes, the brazing filler material may not stick properly to the surface. If this happens, it’s a sign that there is contamination on the surface, such as residual grinder dust or oxidation. In this case, stop the process and clean the area again. Use a wire brush or abrasive material to ensure the surface is completely clean and free of contaminants before continuing.
Step 3: Managing Unexpected Damage
While brazing cast iron, particularly older or more brittle materials, unexpected challenges can arise. During this repair, while grinding the backside of the crack, a chunk of cast iron fell out. This kind of situation isn’t uncommon in old cast iron parts, which can become brittle over time.
However, Muggy Weld was able to handle this issue with ease, thanks to the versatility of SSF-6. The filler material doesn’t just bond well to cast iron; it also effectively bonds mild steel to cast iron. As a result, the hole left by the broken chunk was easily filled with the same SSF-6 silver solder, and the manifold was restored with minimal effort. The damage was repaired with just half a stick of SSF-6, and the manifold was ready for reinstallation within minutes.
Step 4: Cooling the Manifold
Once the brazing is complete, it’s essential to cool the manifold slowly. Rapid cooling can introduce thermal stresses and cause the manifold to crack or warp, undoing all the hard work put into the brazing process. To manage this, we covered the work area to keep the heat in and shield the part from wind, which can cool it too quickly. This ensures that the manifold cools at an even rate, reducing the risk of cracking.
Step 5: Final Cleanup and Inspection
After the manifold has cooled completely, it’s time to remove the residual flux and inspect the repair. While a sanding disc is often used for this, hot water and a wire brush or wheel can also effectively clean the surface. The flux residue can cause corrosion if left on the part, so it’s important to remove it entirely.
Once the surface is cleaned, the manifold should be inspected for structural integrity. Ensure that the filler has bonded well to the base metal and that no areas are weak or unfilled. If the repair was done properly, the brazed area will be as strong, if not stronger, than the original cast iron.
Conclusion
Cast iron exhaust manifold brazing is a highly effective and reliable repair method, especially for vintage or hard-to-replace parts like the 1963 Cadillac DeVille exhaust manifold. As demonstrated in this case with Resurrection Autobody and Paint, brazing provides a quick, durable, and cost-effective solution to repair cracks and holes in cast iron exhaust manifolds. By following the proper steps—preheating, beveling the crack, applying the correct filler material (SSF-6 silver solder), and ensuring proper cooling—a successful repair can be achieved that restores the manifold to its original functionality.
Thanks to brazing, the 1963 Cadillac DeVille’s exhaust manifold was not only repaired but made stronger and more reliable, ensuring that the car could continue running smoothly for years to come. Whether you’re a professional in the automotive repair industry or a DIY enthusiast, mastering cast iron exhaust manifold brazing is a valuable skill that can save time and money while ensuring high-quality results.
Disclaimers:
Please visit https://www.aws.org/Standards-and-Publications/Free-Resources/#YourResources prior to using Muggy Weld products, and adhere to all AWS welding safety guidelines.
Further product safety information is available at http://muggyweld.com/safety-guidelines
Muggy Weld LLC shall not be liable for any loss, injury, claim, liability, or damage of any kind resulting in any way from (a) your use of this Site, (b) any services or products obtained from this Site, (c) any errors in or omissions from this Site, (d) the unavailability or interruption of this Site or any features thereof, (e) any content contained on this Site.
MSDS sheets available with purchase from MuggyWeld.com, upon request.
Check Out These Products
-

SSF-6 Silver Solder Rod: Flux-Coated SSF-6 56% Brazing Rod
Price range: $69.00 through $260.00High-Strength, 56% Silver Solder Rod🌡 Melting Temperature 1150 / 621 ⇄︎ Bonding Strength 70000 psi, 482.63 MPa 🔧︎ Sizes Available (in) 1/16 🔧︎ Sizes Available (mm) 1.58 -

Super Alloy 5 Aluminum Welding and Brazing Rod
Price range: $69.00 through $109.00600°F aluminum welding, brazing, and soldering rod. Ideal for aluminum boat repair and cast aluminum.🌡 Melting Temperature 600 / 317 ⇄︎ Bonding Strength 30000 psi, 206.84 MPa

